WHM 11 setup series
4. How to complete the Initial Setup process in WHM
If you or your host just finished installing WHM & cPanel, the Initial Setup screen shown here should be the first thing you see after logging in as the root user.
If this isn't what you see when you log in, someone has already completed the Initial Setup process. Skip to the next tutorial.
Note that if you make a mistake here, there's nothing that can't be fixed later in WHM. Do try to enter the correct information whenever possible to save yourself some work later on.
1) Read over the license agreement, then scroll down. From here, you'll want to click I Agree Go to Step 2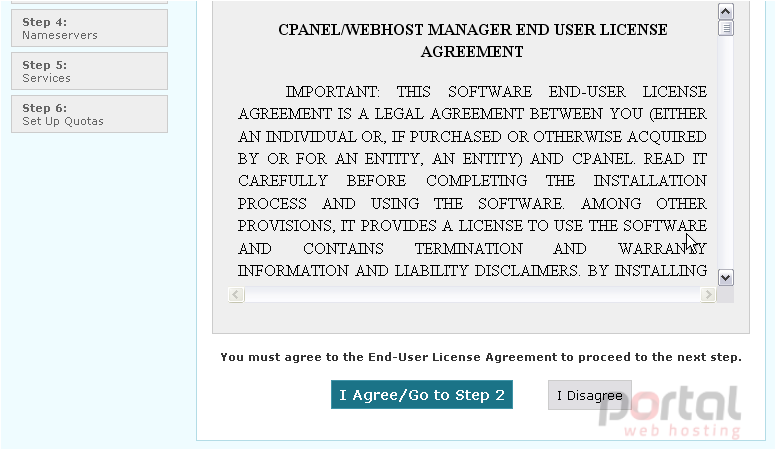
2) First, fill in all the contact information you want. You will be contacted using this information if a problem arises with this server.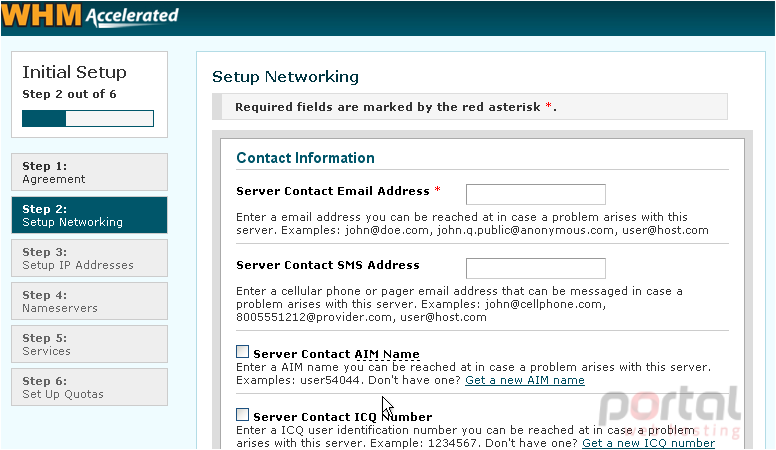
You must enter at least an e-mail address. It's generally best not to use an e-mail address you intend to host on this server.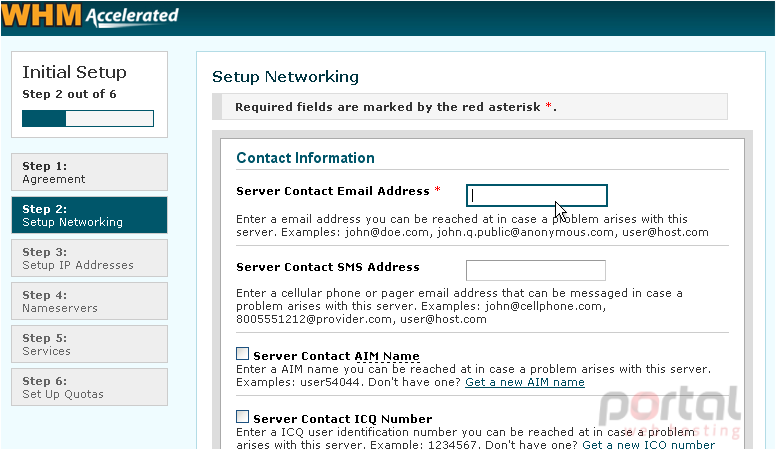
You can also supply a cell phone or pager e-mail address, an AIM Name, or an ICQ Number for the server to contact in case of problems. Near the middle of this series, you will see how to configure the kinds of notifications you wish to receive at each of these addresses.
3) Scroll down and Ensure that the server's hostname is correct. It must be in the correct format, as described below.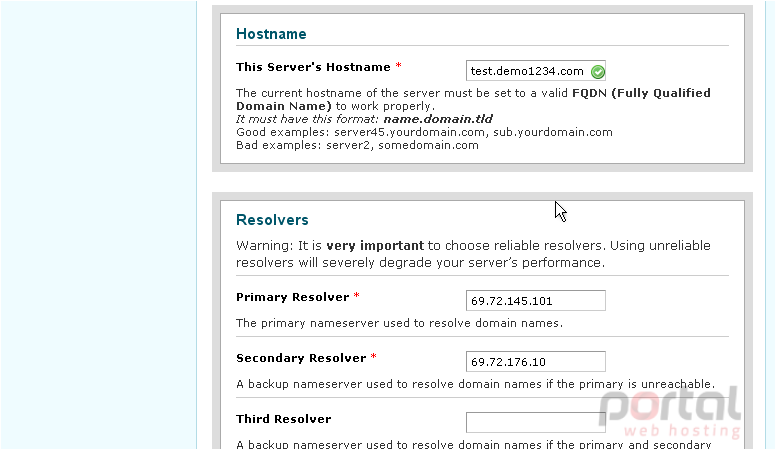
4) Next, you'll need to verify that at least two valid DNS resolvers have been specified. Be warned that using incorrect or unreliable resolvers will severely degrade your server's performance. If you're not certain which IP addresses to use, contact support.
5) Scroll down, the correct ethernet device should be selected already. If you know this is not the case, select a different one from the menu. When finished, click Save and Go to Step 3. It will take a moment for the settings to save.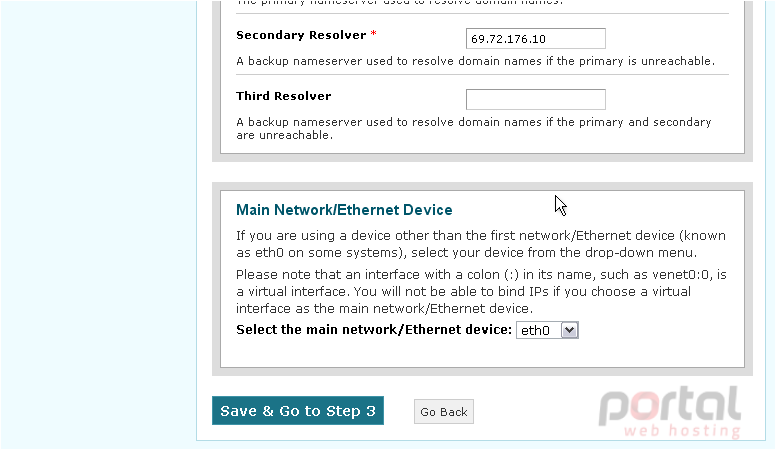
We'll show how to set up additional IP addresses later, but you can add some now if you like. The main IP address has already been configured, and that's all that's necessary. You can obtain extra IPs from your hosting provider, if you haven't already. Our server's additional IPs were already set up for us when we got the server, and yours may have been, too. Note that you cannot add IP addresses on a VDS using WHM, SSH, or any other method that works for dedicated servers. This must be done from within the host server's control panel.
5) If you won't be adding any additional IP addresses, click Skip This Step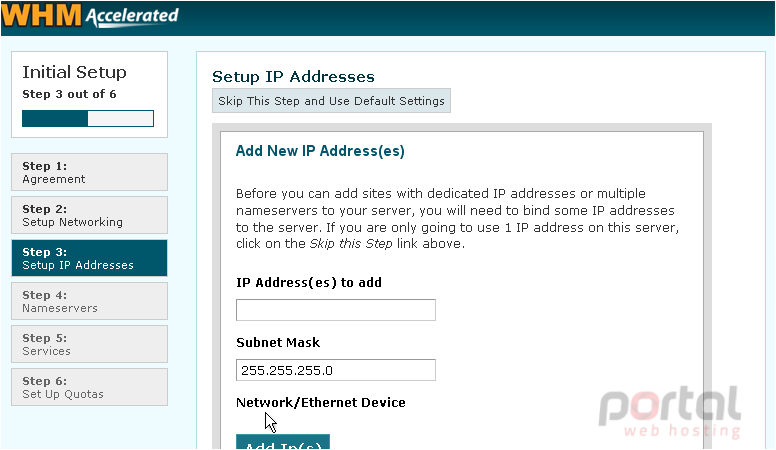
As described on this page, a nameserver is a program that maintains a list of your domain names and their corresponding IP addresses. Without nameservers, visitors wouldn't be able to find the domains hosted on your server. If you have several cPanel servers, it's best to share the DNS records across all of them to minimize the risk of downtime. Hosts with very many websites will even set up servers that act solely as nameservers.
If you decide to use external nameservers, your WHM server won't have any control over the DNS records they contain unless you set up DNS Clustering. Any accounts created on this server will not function unless if this is not done. For details on setting up DNS Clustering, watch the tutorial later in this series.
6) First, choose which nameserver program you wish to use on this server, if any. In most cases, you'll want to leave BIND as the nameserver.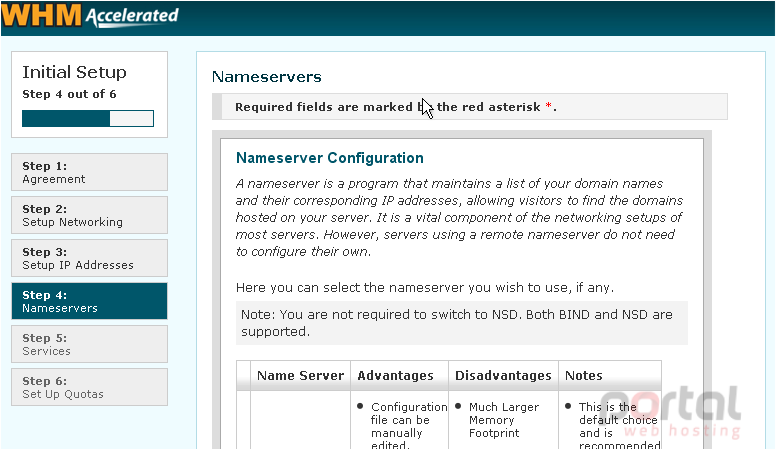
In order to set up nameservers, you'll need an IP address for each one. You'll also need to choose a hostname for each one and specify them both at your domain's registrar. Be sure to create hosts for the nameservers rather than just regular subdomains.
7) Make sure the main domain name is set to use the correct nameservers. For us, NS1 and NS2.demo1234.com should be hosts on our domain as well as the nameservers for the domain. When you've got that all sorted out, enter your nameservers' hostnames here. Then, scroll down.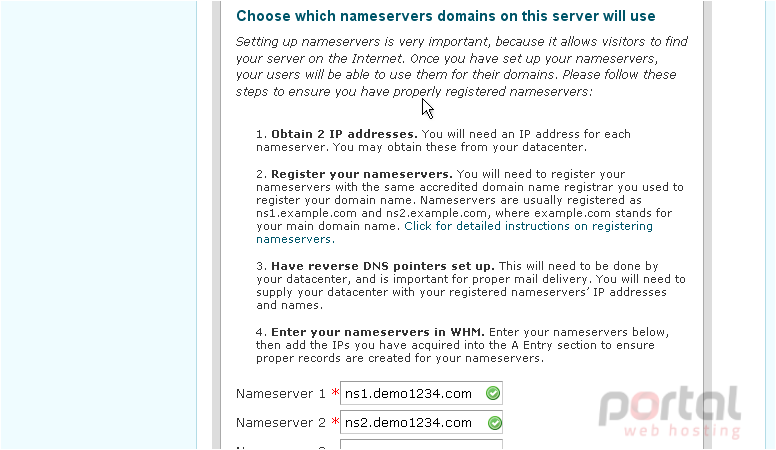
8) Verify that all of the IP addresses listed here are correct. Then, click each checkbox to add "A Entries" for all nameservers and the hostname, assuming they haven't been created already. When finished, Save & Go to Step 5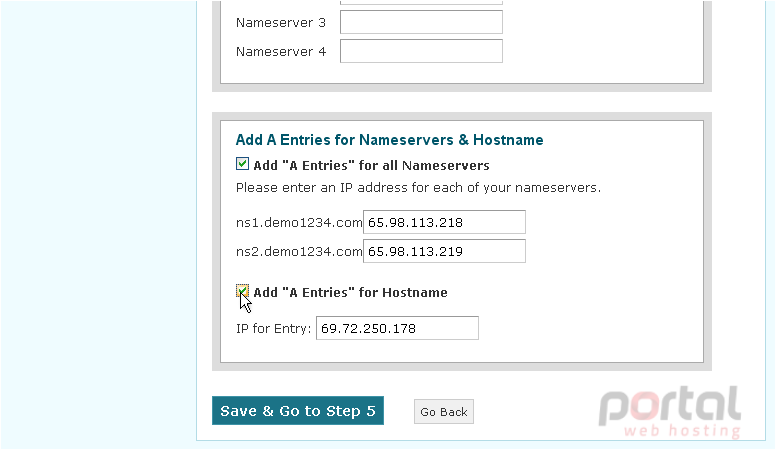
9) Wait for everything to save.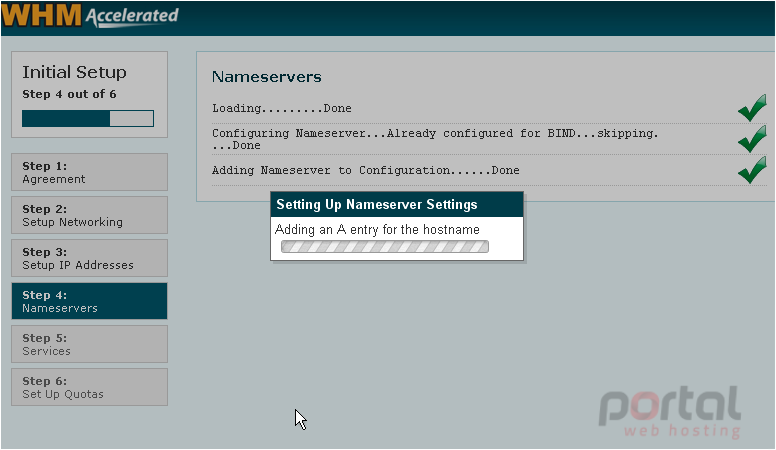
10) All the default services listed here are fine for most servers. However, You have the option of changing the FTP server and incoming mail server. Scroll through the services and change them, if you like, or just click Skip This Step above.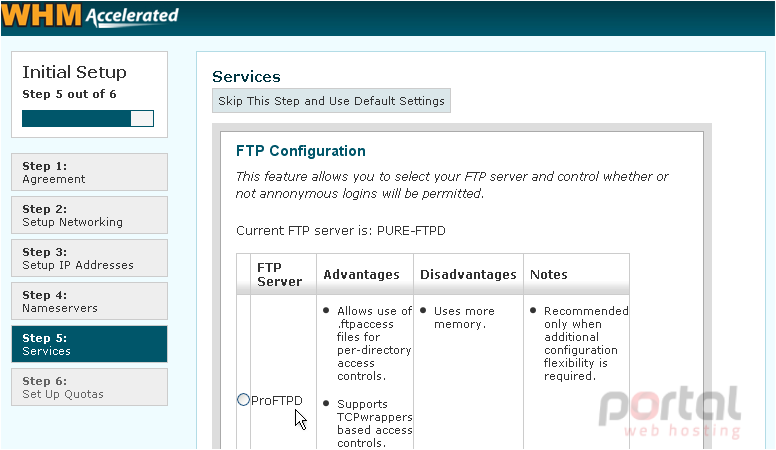
11) You should probably leave the box below checked. cPHulk should also stay on, but you don't have to configure it unless you want to do so. It will help prevent hacking attempts by those with malicious intent.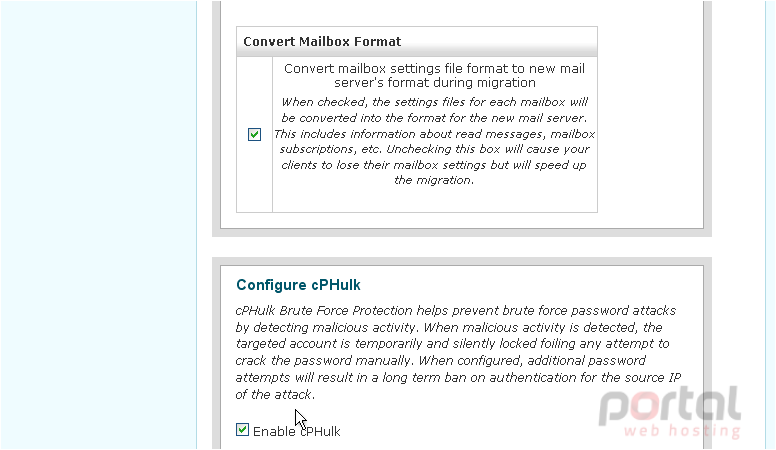
12) Once done, click Save & Go to Step 6.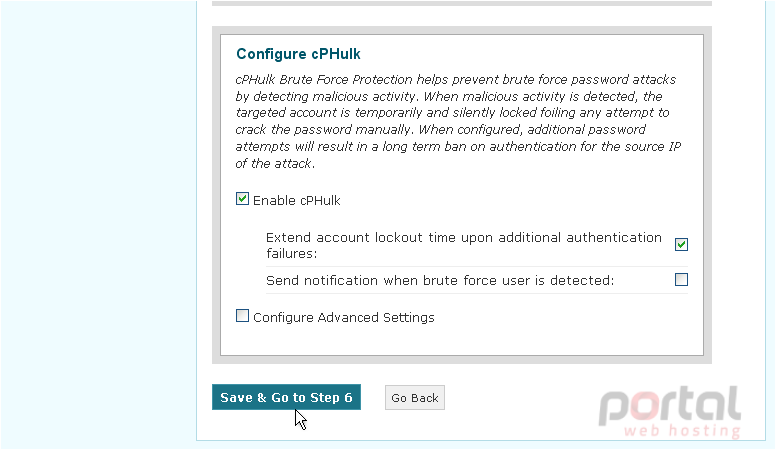
13) Wait for the settings to save.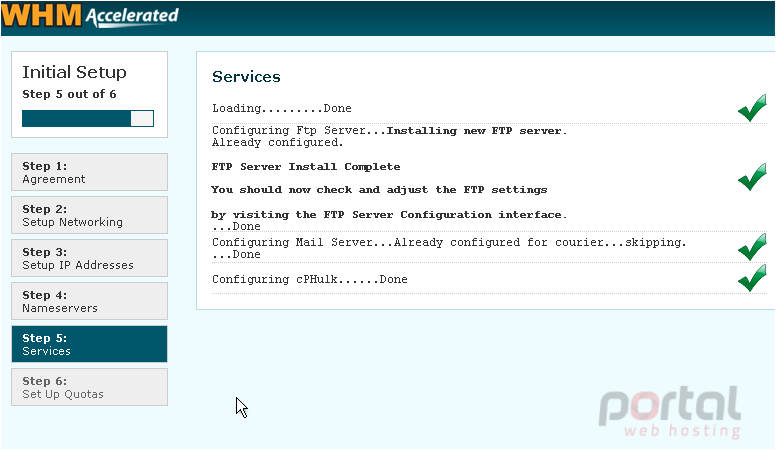
14) Now, for the final step. Disk quotas help you keep track of hard drive usage on a per-user basis and enforce the space limits you give each account. While some hosts want clients to think hard drive space is unlimited, small hosts usually don't have hundreds of terabytes of space and must enforce rigid limits. You will definitely want to leave this turned on. Most virtual dedicated servers and some dedicated servers will need quotas enabled at the operating system level before they can be set up in WHM. Contact support for assistance if you notice problems with the hard drive quotas. Click Finish Setup Wizard to proceed to WHM.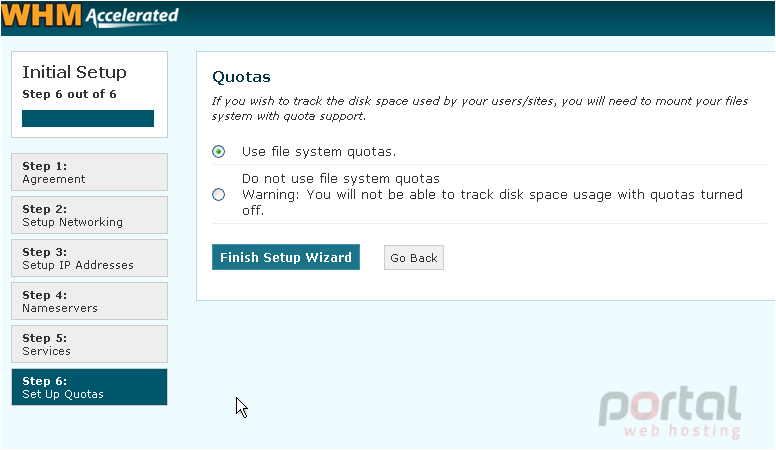
The initial setup is now complete. Everything that you entered before can be changed using the various pages listed here, if necessary.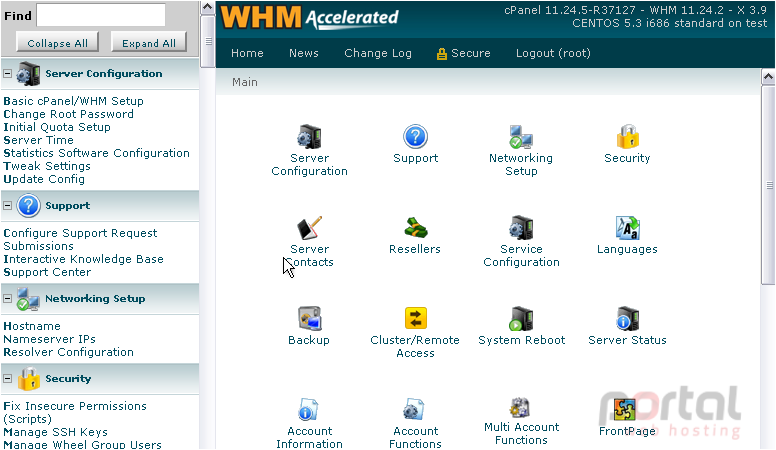
You may shortly see a popup telling you that your hostname does not have an A Entry. Since we just added one, this probably indicates a problem with our nameservers. If you see this popup, you may need to verify their settings as shown later in the series.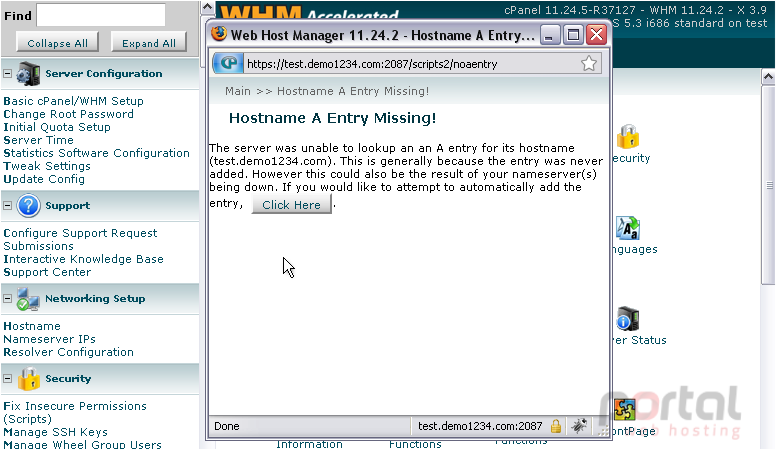
This is the end of the tutorial. You now know how to complete the Initial Setup process in WHM.
For further details on how to set up and use WHM, continue watching the tutorials in this series and the three that follow.